
How To Create The Best Travel Photos

Hahoe Folk Village at Dusk – South Korea
I’m often asked about how to take the best travel photos. I have learned my photography techniques from more than 30 years of travelling and photographing throughout the world. Such a topic is difficult to summarise in a single page. However, below is an overview of the most important rules are contained on this page – something I call the three Cs of photography – Control, Composition and Connection.
Before looking at these 3 rules, I will retell a lesson I learnt early in my photographic career. In 1989 I was in Kakadu National Park in Northern Territory, Australia. I happened to meet a Canadian photographer, Courtney Milne (he sadly died in 2010) who was travelling the world photographing for his book ‘The Sacred Earth’. We sat down together in comfortable camp chairs on a muggy tropical evening. Before we started talking, we needed to put on insect repellent to ward off the numerous mosquitoes that were disturbing us. The only thing missing was a campfire, but we couldn’t light one because we were in a national park.
We discussed photography, and he showed me examples of his gorgeous photographs (particularly from Antarctica), and I showed him fairly average examples of my photographs. Before leaving his hospitality, I asked ‘What one piece of advice can you give me about my photography?’ Without hesitating, he gave a warm smile and said in an encouraging voice, ‘Take as many photos as you can – it’s the best way to improve. You will only learn so much going to photo classes. Go and take lots of photos.’ And that is my same advice for you – after reading the three C’s below – go and take lots of photos to practice these techniques.
Control
Control means control of light, as controlling the amount of light you let into your lens determines the appearance and mood of your photo. Photographing in low light enables far greater control – thus one hour either side of sunrise and sunset are ideal for practising your control craft. Using reflected light (not direct light) coming through an open window or bouncing off walls while the subject is in the shade is excellent for portraits.
Light control is mainly achieved through different apertures or shutter lengths. I usually choose the aperture and allow the camera to decide shutter speed. If the speed is too slow, I increase the ISO until it is possible to photograph without camera shake – or use a tripod. I never use a fully automatic setting for photos. The sensors will assume that you want your photos to be at full daylight, so it will make the photo lighter – and if you want a darker shade in your photos, this will destroy the effect.
For example, take a photo of a sunset on automatic, and it will almost always make the photo brighter – not something you want as it makes the sun too bright and the sky and clouds look too white. An easy way to control light is exposure compensation. Step processes (0.3, 0.5, 1.0) may be too large, but some photographic software allows you to change by margins as little as 0.01. In the sunset example, if you underexpose (-1 or more stops), then it will expose the sun correctly, and this will automatically darken the clouds and sky as a result. The result is something that will match what you see with your own eyes.
When I’m taking photos during the ‘Blue Hour’ or at night, I always use a full manual setting. I usually start at an exposure of 2 seconds with f7.1 aperture and adjust from there. Use a timer or remote control to avoid shake when pressing the shutter. ‘Blue Hour’ is the time where you take longer exposures (more than a second) after the sky appears dark, but it will appear blue in your photos. This period is usually 20-50 minutes after the sun has set. To take these photos, you will need a tripod or somewhere to rest your camera. You cannot hold a camera to take the long exposures required to capture the blue in the sky.
You can use graduated filter settings to darken skies in post-processing. However, using graduated filters at the time of the shoot looks more balanced and is more versatile than computer software. Try neutral density filters, for they give great flexibility in bright conditions.
Regardless of what camera type you purchase, if you are serious about photography ensure it allows manual alterations of aperture, shutter speed, exposure, and ISO. Also, choose a camera that shoots RAW, its post-processing options are far more comprehensive compared to JPEG.
When people ask me about what equipment to use, I always recommend a DSLR or Mirrorless Camera because it allows you to control light better. Compact cameras and phone cameras do not allow you this control, and even if they do, the amount of control is restricted.
In the photo above of Hahoe Folk Village, South Korea, the light was controlled by using a graduated grey filter on the top section of the photo. This filter is placed over the lens, and it darkens the sky while leaving the rest of the photo untouched (due to the filter only being partially grey, the rest is clear). Due to the camera wanting to overexpose this scene to make the photo look more like full daylight, I ensured that I did a test photo on the empty street beforehand – and it was too light, so I underexposed by half a stop. Once I had the lighting correct, I just needed to wait for people to populate this scene, and it was not a long wait for this to occur. The only post-processing done on this photo was distortion control and a slight increase in contrast to counter the haze.

Nature Takes Command at Ta Prohm Temple – Siem Reap, Cambodia
Composition
Less can be more with photography. One person may have more impact than a crowd, and one tree may be more effective than a forest. Does something in the frame distract from the subject? – bright object, garbage, tree branches behind a person’s head, cluttered background – the list is endless. If so, find a different perspective or zoom to remove unwanted distractions. You have the option to crop a photo in editing if something at the side of a photo is distracting, but if it is very close or behind the main subject, this will not be possible.
A popular photographic rule is to position a major point of interest away from the centre – a third of the way in from the top, bottom, left or right – hence the name given to this practice – the rule of thirds. You don’t need to follow this every time, but it is helpful in the majority of cases.
Also, practice what is termed ‘leading lines’ – these are lines that lead your eye from the front to the back of the photo – they can be roads, fences, walking trails, a row of trees, the lines of a building. These are very effective in photography.
Try different perspectives, especially with wide-angle photography. A few steps forward, back, left, right, squatting or going higher will make an immense difference to your final image. Look at the images after you have taken them to compare. You will soon see the difference a slight change of position can make to your photos.
Remember depth (foreground, middle and background) as it gives the viewer the feeling of literally walking into a picture. If applying this technique, use a small aperture (f11) instead of a larger one (f5.6) for greater focal range.
Digital technology allows you to take many photos and easily discard the unacceptable ones. Take multiple images, review them at home afterwards; analyse why you like one photo and why not another.
In the photo above of Ta Prohm, Cambodia, this is a commonly photographed scene of the Ta Prohm Temple. I saw many people come and go, and they all did the same thing – they stood to take their image just to the left of where my photo was taken. I wanted a more dramatic composition, so I moved to the right and knelt near to the tree root at the front of the photo. Even that short shift in position made a dramatic difference to the power of this image. Look at the leading lines the large root now makes. There was a lot of clouds that day, so it allowed me to take this photo with an even light – had any sunlight shone onto this scene, it would have destroyed the mood of the photo. At the time of photographing I slightly underexposed the photo (the camera wanted to increase the light in the image that I didn’t want), and in post-processing, I needed to make a colour control adjustment, distortion control and increase contrast to remove the haze in this scene.
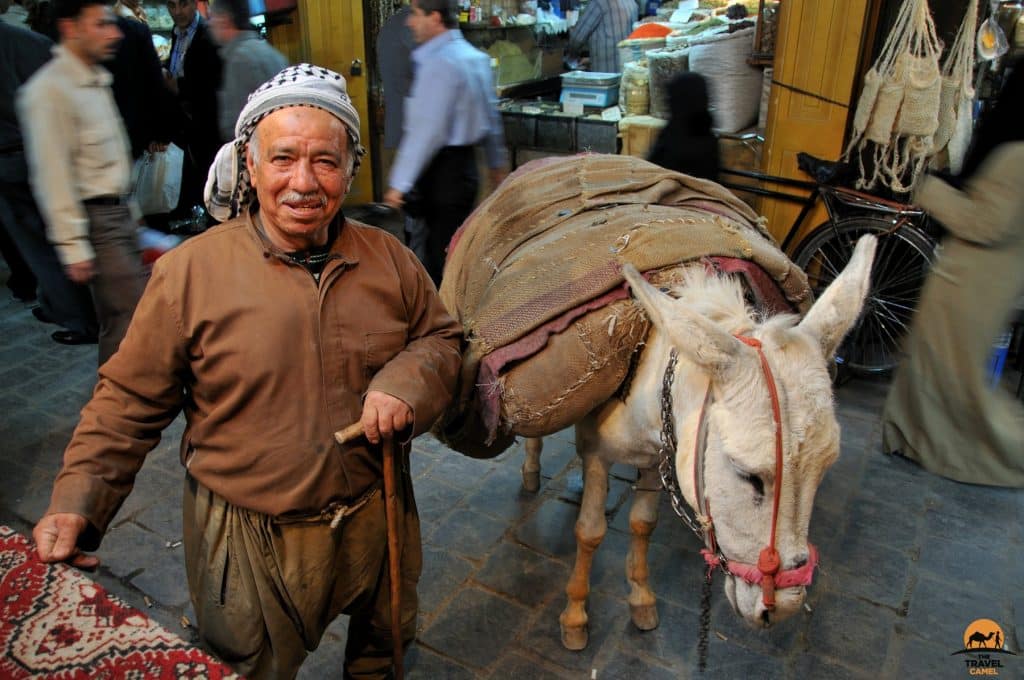
Man and his Donkey – Aleppo Souq, Syria
Connection
The secret ingredient in photography. There are brilliant photographers in the world (many far better than me), and their images are extremely beautiful technically, but a number take photographs that are clinical and cold. There is no warmth in their images.
With any location, take time to sit and absorb its ambience and try to connect with it before raising your camera to start shooting. I usually spend the first afternoon or morning in a place just walking and rarely photographing to get an understanding of how the place makes me feel. I think of this feeling and try to capture that feeling in my images. This leads me to capture what I term a ‘Sense of Place’.
More importantly, take time to connect with the people you are photographing. Sit down, have a conversation. Don’t initially ask to photograph, find out some information about the person or people you are talking with and engage with them before making the request. In many cases, I try to return to the same place after my initial visit – usually a day later. The more people that recognise and know me, the more likely they will agree to be photographed. By way of example, the image of the sadhu below this section was taken on my second visit to the temple, and I had spoken to this sadhu on three occasions before taking the photo – once on the first day and twice on the second visit. This type of photography takes a lot of time, and such slow travel (staying in one place for a while) lends itself to a better quality of photography.
I always ask permission from a person before taking any photo (unless it is a scene with many people, or if the sole person in the photo only occupies a small part of the image and they cannot be identified). By requesting permission to take a photo of a person, it means you will not always be granted permission, but the quality of your images you do take will be far superior.
Connect with people and places, and your photos will contain a warmth that is difficult to describe but easy to discern.
In the photo above of the Aleppo Souq, Syria, I was sitting in the Souq for more than an hour talking to some shopkeepers. I kept seeing this man with the donkey pass back and forth doing his shopping within the market. I mentioned to one of the shopkeepers that the man and his donkey would make a fabulous photo. They informed me if this man passed by again, they would ask. Sure enough, he again passed by with his donkey by his side, and the shopkeeper explained my request. He readily agreed. I used a slow shutter speed to enable enough light into this photo plus it gave a blur to the people passing in the background. I was fortunate that both the man and the donkey stayed so still. I decided to take the photo from the raised platform of the shop instead of from the ground because this higher view prevented a cluttered and lighter background from the shops of the back. The background was more even in light and less busy when taken from this higher angle. By spending so much time in one place, I had a feel for the Souq, and I had connected with the people I spoke with – and both these factors enabled this photo to happen. The only post-processing was colour control, distortion control and the slightest increase of contrast.

Friendly Sadhu at the Pashupatinath Temple – Kathmandu, Nepal
The Art of Photography
In the darkroom days, it could take hours to expose, colour balance correctly, dodge or burn one image (the last two change the light intensity in a portion of the photo). Due to equipment, time, and chemical smell that came from mastering the Art of the Darkroom, it dissuaded many adherents. Thus, one had to heavily rely on getting the image right at the time of capture – the Art of Photography.
The use of computer technology means that these darkroom modifications can be achieved in seconds instead of hours. All of the photos shown on this page involved less than 5 minutes of post-processing for each image – something that would have taken hours in a darkroom. It is a wonderful revolution for photographers, but its ease has caused an over-reliance on the Art of Digital Processing.
If you are serious about photography, be careful of being seduced too much by the Art of Digital Processing. The time spent in attempting to master digital post-processing techniques is more productively and better spent in the field perfecting your photography skills. Photography, like travel, involves a lot of waiting, waiting for the correct light, waiting for the elements in the scene to be just right, waiting for a street scene to be neither too crowded nor too empty.
If you regularly rely on computer software to alter your image from something average to a thing of beauty, you have mastered the Art of Digital Processing, not the Art of Photography – and this latter Art is the more difficult and infinitely more satisfying to master.
Photography’s Hidden Benefit For Travellers
There is a benefit to the pursuit of photography when travelling that is not immediately apparent. Still, after decades of photographing, I’ve noticed that I have developed a heightened sense of awareness of my surroundings. It’s all those little details that would usually escape my attention if it was not for a camera in my hand. The two people whispering to each other in a corner, the way an older person leans on their cane, the ability to discern to see how light flows into rooms, doorways, and how reflections make a scene look, and how leading lines capture your attention.
You hear some people say that it’s better to put down your camera when travelling so that you can experience a destination better. I beg to disagree – having that camera heightens your observation skills, and this greatly assists to in allowing you to observe more in the places you visit. Of course, you cannot look through the viewfinder of a camera all the time and not even ten per cent of the time. But looking at the world with a photographer’s eyes will heighten your travel experience in ways you have not thought possible.
Read more: The Benefits of Slow Travel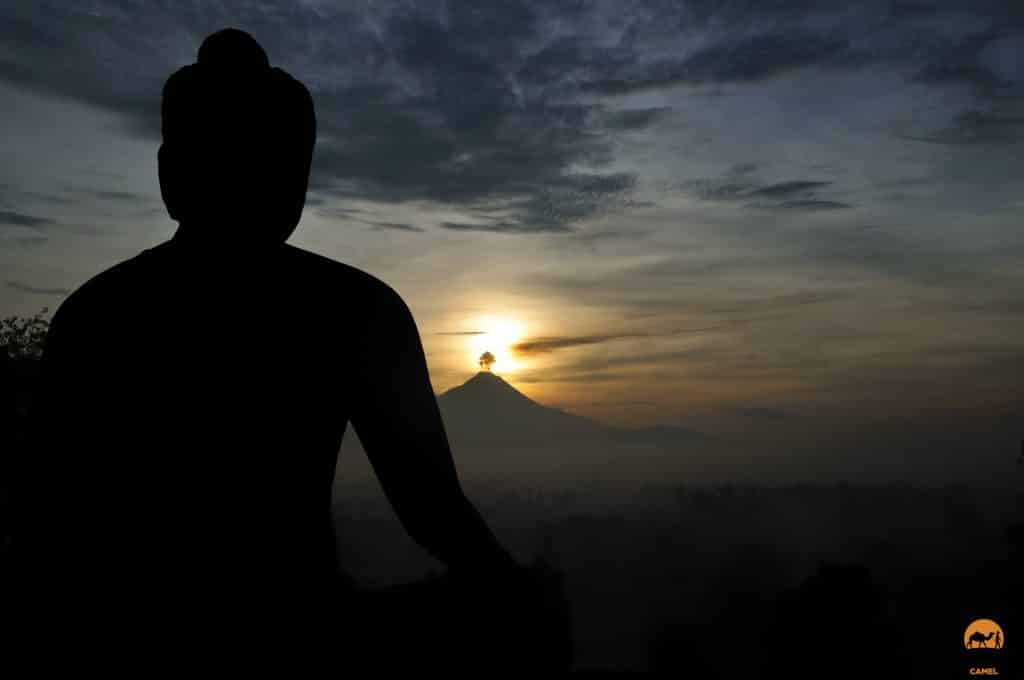
Sunrise over Mt Merapi at Borobudur – Indonesia